(2 intermediate revisions by the same user not shown)
Line 2:
Line 2:
== Graphical setup (Easy/GNOME) ==
== Graphical setup (Easy/GNOME) ==
[[File:Gvim in GNOME Software.png|alt=Screenshot showing search result for Gvim in Software app of GNOME|thumb|Gvim in Software app of GNOME]]
1. Install Gvim: Search "Gvim" in Software app (if you are using GNOME) and install.
1. Install Gvim: Search "Gvim" in Software app (if you are using GNOME) and install.
2. Install vim-gpg plugin:
2. Install vim-gpg plugin:
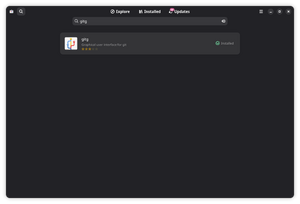
:2.1 Install gitg from GNOME Software
:[[File:Gitg in Software app of GNOME.png|alt=Screenshot of searching for gitg in Software app of GNOME|thumb|gitg in Software app of GNOME]]2.1 Install gitg from GNOME Software
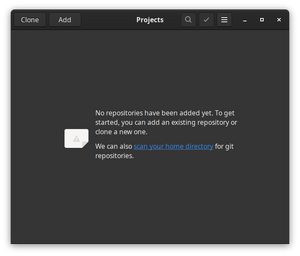
:2.2 Start gitg from activities.
:[[File:Gitg first screen - Projects.png|alt=Screenshot of gitg first screen showing empty projects list|thumb|gitg first screen showing empty projects list]]2.2 Start gitg from activities.
:2.3 Click on "Clone" option in gitg.
:2.3 Click on "Clone" option in gitg.
:2.4 Add https://github.com/jamessan/vim-gnupg.git as URL
:2.4 Add https://github.com/jamessan/vim-gnupg.git as URL
Latest revision as of 03:40, 29 October 2025
vim-gpg plugin allows transparent editing for files encrypted using GPG .Those who are new to GPG can follow this guide.
Graphical setup (Easy/GNOME)
Gvim in Software app of GNOME
1. Install Gvim: Search "Gvim" in Software app (if you are using GNOME) and install.
2. Install vim-gpg plugin:
gitg in Software app of GNOME2.1 Install gitg from GNOME Software
gitg first screen showing empty projects list2.2 Start gitg from activities.
2.5 Select ~/.vim/pack/bundle/start/vim-gnupg as "Local Folder". In "Local Folder" drop down, choose "Other" at the bottom, click on "Home" on the left bar, choose Create Folder icon on top right, and enter .vim and then repeat the same to create each sub folders - pack, bundle, start, vim-gnupg. Then click Clone on the top right.
Now you can just right click on any encrypted file in your file manager and open with GVim. This plugin will decrypt the file and let you view or edit its contents. You can enable "Always use for this file type" to just open it by double clicking it next time.
Advanced/Command line setup
1. Install vim using your package manager
sudo apt install vim
OR (Those who prefer the GUI way of doing things can use vim-gtk3).
sudo apt install vim-gtk3
2. Install vim-gpg plugin
2a If you are on a debian based distro. There is a package called `vim-scripts` that already has this plugin. So installing this package would make things a lot easier
sudo apt install vim-scripts
Now add the line "packadd! gnupg" to your ~/.vimrc. You can use a graphical text editor like GNOME Text Editor or GVim to open ~/.vimrc file and add this line to the end of the file (if it has some contents already or just add it to the start if the file is empty).
echo "packadd! gnupg" >> ~/.vimrc
That's it ! Now you can open your gpg encrypted file using vim and it will ask for your passphrase.
OR
2b You can use Vim's package support to contain the plugin in its own directory.
  mkdir -p ~/.vim/pack/bundle/start
  cd ~/.vim/pack/bundle/start
  git clone git@github.com:jamessan/vim-gnupg.git
Vim will find and load everything on its own, without mixing the files with others.